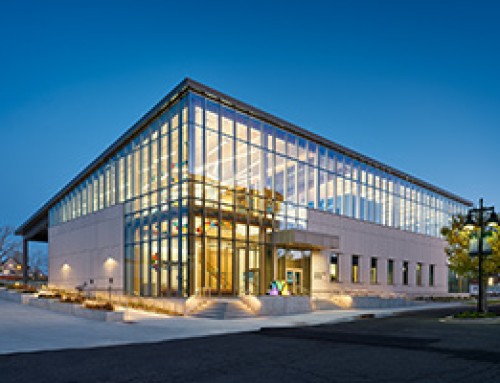
WSDG – Project Page
Even with 16 stories worth of recording studios and student dorms constructed into 155,000 square feet, John Storyk says Berklee College of Music still didn’t have enough room to include all the amenities programs directors wanted in its new 160 Massachusetts Ave building.
“Programming was a long process and involved many people and many heads,” says Storyk, cofounder, architect and acoustician of Walters-Storyk Design Group. “Everyone wanted more than we had room for.”
However, three years and $100 million later, Storyk says the new building has amped up the way the college teaches its students and expanded its class repertoire.
While most of the building’s floors are comprised of student rooms, it also includes 21,400 square foot cafeteria and performance space, and two basement floors loaded with production studios and equipment.
Studio 1, which is located on Level A in the building’s basement, is designed to accommodate as many as 50 orchestra members, recording/mixing suites, control rooms for classes, and two ISO Booths. Studio 2, also located on Level A, features another ISO Booth and control room.
[youtube id=”PghNESo8g-Y” width=”600″ height=”350″ autoplay=”no”]
A live recording and mixing session in one of the building’s new studios.
Level A also houses a Central Machine Room, which encases half of the building’s “enhanced connectivity.”
“Upwards of 100,000 feet of cable has been linked via some 5,500 individual connectors,” Storyk says, describing the wiring connecting to the central machine room.
Level B is made up of rooms catered to small ensemble recording, Studio 3 (which contains the second Central Machine Room), another ISO Booth, Live Room, and Mastering/Critical Listening Lab. Level B also has a Dubbing Stage loaded with Dolby Atmos equipment, along with ISO Booths, Overdub Booth, and Production Control Suite.
The building’s new studios enable the college to have space for extended teaching tracks, such as dubbing/film mixing and orchestral recording/composition/scoring
Storyk, who is also a visiting professor at Berklee, says that while many of the rooms contain similar equipment, they were crafted to hold classes and to have their own signature.
“They’re teaching rooms, but each one has a slightly different flavor,” he says.
The fourth floor includes ensemble rooms and individual practice rooms for student rehearsals. The floors above contain student dorm rooms, and a fitness center.
Storyk says the “coolest” room in the building is the cafeteria, due to its dual purpose design.
“It depends on who you talk to,” he says. “Some people think it’s a cafeteria and, “oh, by the way we play,” and then some people think it’s a performance hall, “oh, by the way we eat.”
[youtube id=”JHwY8O06eKI” width=”600″ height=”350″ autoplay=”no”]
A quick look at Berklee’s new cafeteria/performance space.
Berklee’s Building Goals
With the building opening its doors to students about a month ago, Storyk says the college wanted to accomplish a small handful of goals.
To start, he says Berklee “had to expand.”
“There was a shortage of practice rooms and we needed new studios,” he says. “We had studios, but not at this building.”
Storyk also says the college wanted to create an updated, contemporary space for its students, faculty and staff, especially with the new cafeteria/performance room.
“The old [cafe] space was terrible,” he says. “We [now built] a first class student cafe with a real ability to perform. The cafe has incredible sound.”
Storyk also said the building is a signature of Berklee’s current president, Roger Brown.
“The goal was to make the rooms have their own signature,” he says. “Happiness for me is to come back in ten years and for it to still look fresh. I think we’ve accomplished that.”
Berklee’s Building Challenges
Storyk says that the building team faced challenges as small as untangling wiring to the tribulations of accommodating all the “talking heads” involved.
“Just the sheer size of the project” was a challenge, he says. “To have this many studios and dorms in the middle of Boston. It’s a perfect storm of craziness.”
Judy Elliot-Brown, the integrator and client project manager for Berklee’s building project, says one of her team’s biggest challenges was managing construction.
For one part of the installation, the construction crew planted a crane in the middle of the building through to the sub-basement level, which reduced space to work.
“The crane’s footprint ran through the mastering room, smack through the main control room on the top floor,” she says. “We had no room.”
Elliot-Brown also says her team faced times where they had to wait for construction to be completed in certain rooms because multiple crew members could not work simultaneously.
“If you’re in a residential building, you can have six things happening at the same time,” she says. “In [Berklee’s] floating rooms, you can’t do that. They had to be built in sequence, not in parallel.”
Storyk says that the building’s design underwent edits, especially with its ceiling heights and basement depths.
“We were supposed to have three floors for students,” he says. “But, it was either we have three floors and compromise the ceiling height, or have two great floors.”
Storyk says his greatest regret about the building was the inability to capture sunlight in the basement floors. He says he reworked the design, including light wells in the lobby and a see-through square in the center of the above floors, but to no avail.
[youtube id=”Pw7E51A_hag” width=”600″ height=”350″ autoplay=”no”]
John Storyk walks us through the basement studios of Berklee’s new building.
“The only place the studios could go were in the basement,” he says. “We were stuck. It’s a shame to have spent 15 million dollars on one of the best studios to not have daylight.”
However, Storyk says that the colleges makes up for its lack of light by providing the best equipment, top of the line dorms, and making the overall building interesting.
“We got through it,” he says. “Sometimes, there were wrestling matches, but we’re through it. I’d give us an easy A minus…we did the best we could do.”
Tips To Keep in Mind While Building Your Own Monster Studio
Invest in a client project manager
Elliot-Brown says that someone in her role will help the overall project run smoothly.
“That’s their only job,” she says. “The client project manager acts to help draw the program together so they can clarify the design requirements for the integration company and the time frame. They help with the equipment selection, advising if they think something is missing, doing the budgeting workup so the school understands [what’s involved] to actually install [the equipment].
Get your programming done ASAP
Storyk says that completing your programming for the building will help reduce stress and create a clear-cut outline where your project is heading
“Get programming done as early as possible,” he says. “Site, studios, figuring out what needs to be done, figuring out how much money you need, how much money you need to fundraise, etc.”
Identify your objectives
Elliot-Brown says once a college identifies the studio’s objectives for its students, the rest of the planning will fall into place.
“Evaluating your existing program strengths and faculty resources is the first step,” she says. “Then you need to identify how to expand on those core strengths to create new opportunities for the students.”
Get organized
“Try to get your wish list and reality check in place as early as possible,” Storyk says. “It will save you the anxiety.”
Berklee’s Gear (Put together by Judy Elliot-Brown)
Overall Facility Connection:
• MADI was used to interconnect the facility.
• A fiber infrastructure connects between the Cafeteria stage and the MADI router in Level B.
• Both the Neve consoles on level A connect to the MADI router on Level B for use with a “floating” Analog to MADI converter.
• The Dub Stage Avid/Euphonix console on level B connects to the MADI routing system.
• The CR3 ProTools system also has a “floating” Analog to MADI that will be connected to the MADI routing system.
• The ProTools systems used for the facility included Avid HDX with Avid HD I/O.
Level A
Studio 1 – Orchestra Room
This studio was specifically designed for film scoring and orchestral recording.The installation included a motorized screen, a projector, analog headphone systems, digital headphone systems and connectivity for displays and headphones at a conductor’s podium position.
Projector – Digital Projection D-Vision 30 1080P
Screen – Stewart Filmscreen Stealth Trapdoor
Control Room 1
This control room has a large analog console, (3) ProTools systems (Recorder, Audio Playback & Video Playback), a front wall display and large soffit mounted monitors (speakers). The front wall display signal is supplied by an HDMI switcher located in the equipment racks.
Console – Neve 88RS, 60 input
Main Monitors – ATC 200 ASL (soffit mounted) with JL Audio f113 subwoofers
Display – Sharp LC 70LE550 70”
ProTools Controllers – (2) control carts each w/ (1) Avid Artist Control, (1) Avid Artist Mix, a 24” display, keyboard and mouse
Controller Switching – iHse Draco Tera KVM matrix
Studio 2
This studio was designed for small group recording. The installation included analog headphone systems, digital headphone systems and tielines for guitar amplifiers.
Control Room 2
This control room has a large analog console, a ProTools system, a front wall display and large soffit mounted monitors (speakers). The front wall display signal is supplied by an HDMI switcher located in the equipment racks.
Console – Neve 88RS, 48 input
Main Monitors – Griffin G1.5 (soffit mounted) with Griffin LFE 15S subwoofers
Display – Sharp LC 60LE550U 60”
ProTools Controller – (1) control cart w/ (1) Avid Artist Control, (1) Avid Artist Mix, a 24” display, keyboard and mouse
Level B
Studio 3
This studio was designed for small group recording. The installation included analog headphone systems, digital headphone systems and tielines for guitar amplifiers.
Control Room 3
This control room has a large analog console, a ProTools system, a front wall display and large soffit mounted monitors (speakers). The front wall display signal is supplied by an HDMI switcher located in the equipment racks.
Console – Solid State Logic Duality, 48 input
Main Monitors – ATC 150 ASL (soffit mounted) w/ JL Audio f112 subwoofers
Display – Sharp LC 50LE650U 50”
ProTools Controller – (1) control cart w/ (1) Avid Artist Control, (1) Avid Artist Mix, a 24” display, keyboard and mouse
Dub Stage
This control room was designed for film mixing (5.1 & 7.1 surround). The installation included (4) ProTools systems (Recorder, Audio Playback I, Audio Playback II & Video Playback), a fixed screen and projector, large L/C/R speakers mounted in the front wall and surround speakers on the side and rear walls. The projector signal is supplied by an HDMI switcher located in the equipment racks.
Console – Avid/Euphonix System 5 console configured as Dual Operator with (48) analog inputs & outputs, (24) AES inputs and outputs, and (24) MADI streams inputs and outputs (64 channels per stream)
Main Monitors – The main monitors are JBL Cinema Sound (THX certified) in the following configuration:
• Front L – JBL 3731T (Tri-amped)
• Left LFE – JBL 4641
• Front Center – JBL 3731T (Tri-amped)
• Front Right – JBL 3731T (Tri-amped)
• Right LFE – JBL 4641
• Left Side Surround – (3) x JBL 8340A
• Right Side Surround – (3) x JBL 8340A
• Left Rear Surround – JBL 8340A
• Right Rear Surround – JBL 8340A
Projector – Digital Projection D-Vision 30 1080P
Screen – Stewart Filmscreen
ProTools Controllers – (2) control carts each w/ (1) Avid Artist Control, (1) Avid Artist Mix, a 24” display, keyboard and mouse
Controller Switching – iHse Draco Tera KVM matrix
Production Control Room
These control rooms are used by one person and use ProTools controllers to work “in the box” system. They also have analog outboard gear to record with. The monitor speakers use an outboard controller.
Main Monitors – Genelec 8050A with a Genelec 8070 subwoofer
ProTools Controller – (1) Avid Artist Control, (1) Avid Artist Mix, a 24” display, keyboard and mouse
Monitor Controller – Mackie Big Knob or Dangerous Monitor Controller


